
If you’ve ever walked out to your yard only to find a single zone of grass turned into a swamp, or perhaps a zone that refuses to turn on at all, you’ve likely met the “heart” of your sprinkler system: the irrigation valve. The unique clay-heavy soil and wild temperature swings (hello, 40-degree drops in an afternoon) can be absolutely brutal on these mechanical components.
When a valve fails, you’re stuck with either a dying lawn or a water bill that looks like a phone number. While a full irrigation valve replacement in Commerce City, CO, might sound like a job reserved for the pros, some homeowners are brave enough to tackle it themselves. But before you start digging, you need a solid game plan to avoid turning a small fix into a neighborhood flood.
A Practical Guide to Replacing Irrigation Valves in Commerce City, CO
Let’s have a look at the step-by-step guide to replace irrigation professionally.
Step 1: Confirming the Culprit
Before you go through the hassle of replacing irrigation valve units, you have to be sure the valve is actually the problem. Sometimes, the issue is just the solenoid, that little black cylinder with two wires sticking out of the top.
If your controller says the zone is on, but nothing is happening, try turning the solenoid a quarter-turn counter-clockwise. If the water kicks on, the valve’s “guts” are fine, and you might just need a solenoid swap or a bit of irrigation valve repair. However, if water is constantly weeping out of the heads even when the system is off, or if the valve body itself is cracked from a late-spring freeze, you’re looking at a full irrigation valve replacement in Commerce City, CO. For more complex issues, consider professional irrigation repair in Commerce City, CO, to ensure everything is working properly.
Step 2: Digging Without the Disaster
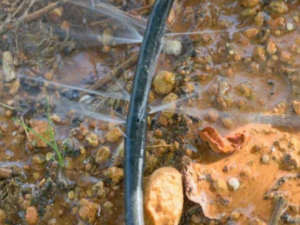
In our area, valve boxes are often buried under layers of mulch or overgrown Kentucky Bluegrass. Once you find the box, you’ll likely find it filled with fine, silty dirt.
You’ll need to dig out the soil around the valve, and I mean all of it. You need enough “elbow room” to work your pliers or a saw without getting mud inside the pipes. If you get dirt into the line during the irrigation Sprinkler repair, you’ll end up clogging every sprinkler head downstream, turning a one-hour job into a weekend-long nightmare.
Step 3: Out with the Old
First things first: shut off the main water supply. If you skip this, you’re going to get a face full of pressurized water the second you loosen a fitting.
- Disconnect the Wires: Snip the wires leading to the solenoid, leaving enough length to reconnect them later.
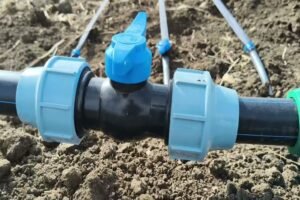
- Cut or Unscrew: Most systems in our region use PVC. You’ll likely need to cut the pipe on both sides of the old valve.
- The “Manifold” Trap: Be careful if your valves are grouped closely together in a manifold. One wrong move or an over-tightened fitting can crack the neighboring valve, leading to a much larger irrigation leak repair project than you bargained for.
Step 4: Installing the New Valve
When you buy your new hardware, make sure it matches the size (usually 1 inch) and the thread type of your old one.
- Direction Matters: Look for an arrow on the side of the valve body. That arrow must point in the direction of the water flow (away from the main line and toward the sprinklers).
- The Glue Factor: If you’re using PVC primer and glue, work fast. In the dry air that glue sets almost instantly.
- Wiring: Use waterproof wire nuts (the ones filled with silicone gel). Standard electrical tape won’t hold up against the moisture in a valve box and will eventually lead to an unresponsive zone.
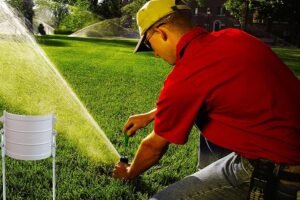
Step 5: Testing and Tuning
Once the glue has cured (give it at least 30 minutes), slowly turn the water back on. Going from zero to full pressure instantly can create a “water hammer” that might blow your new fittings apart.
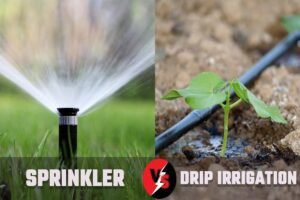
Check for leaks immediately. If everything looks dry, run the zone from your controller. This is also a great time to perform some general irrigation maintenance. Check for low-pressure irrigation issues in that zone, which could indicate that a bit of debris got into the line during the swap. If you have drip irrigation attached to the zone, make sure the pressure regulator is still doing its job.
Why the DIY Route Can Be Risky
While a handy homeowner can certainly manage an irrigation valve replacement in Commerce City, CO, the margin for error is thin. One poorly glued joint or a cross-threaded fitting can lead to a slow leak that goes unnoticed until you have a sinkhole in your yard. Plus, our local soil likes to shift, meaning if the pipes aren’t bedded correctly, the vibration of the valve opening and closing can cause new cracks within a year. That’s why trusted professionals like Ascend Landscaping & Irrigation are here to ensure your system is installed properly and functions flawlessly.
Conclusion
A functioning valve is the difference between a lush, green oasis and a muddy mess. The steps above can guide you through a basic swap. However, don’t hesitate to admit when a project is over your head. This is especially true when it involves high-pressure water and electrical components. Whether you’re dealing with a stubborn leak or a total zone failure, keeping your system in top shape protects your home’s curb appeal.
Don’t let a faulty valve ruin your lawn or your weekend. If you’re not comfortable digging in the mud or dealing with wiring, contact the experts for irrigation valve replacement in Commerce City, CO. At Ascend Landscaping & Irrigation, we provide fast, professional irrigation repair that stands up to the Colorado climate. From simple tune-ups to complex manifold rebuilds, we’ve got you covered. Contact us today to schedule your service and get your yard looking its best again!
Frequently Asked Questions
Q: Why does my sprinkler zone stay on even when the timer is off?
Ans: This usually means the diaphragm inside the valve is torn or stuck open with debris, requiring a repair or replacement.
Q: Can I just replace the top part of the valve?
Ans: Yes, if the bottom body is still in good shape, you can sometimes “gut” a new valve and put the parts into the old housing.
Q: What is the average life of an irrigation valve?
Ans: Most high-quality valves last about 10 to 15 years before the plastic or seals begin to fail.